Tree Removal Methods
Hey guys certified arborists world champion tree climber here with your stihl pro tip. Anytime you want to cut a tree down the first and foremost thing you must think about is doing a proper assessment in that the assessment is going to tell you what you need to know to get out of there safely and get the job done right. The first part of a good assessment starts by looking at the hazards. If there’s any present you want to identify them before they come back to haunt you.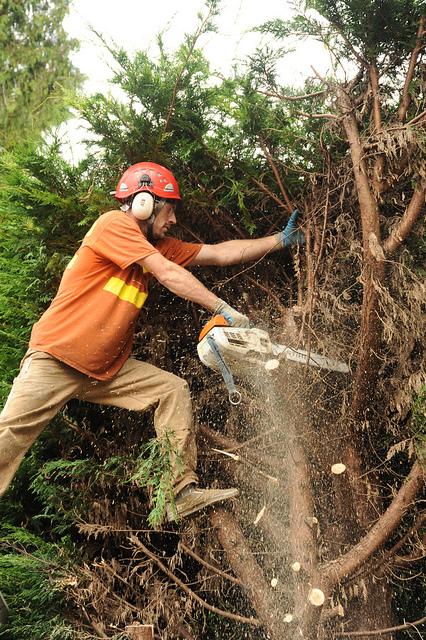
I look for electrical hazard first and foremost. The next thing I’m looking for are things that could affect my personal safety or any one of my crew. On that list, first and foremost would be looking for branches that are just lodged in the tree hanging there waiting to fall out otherwise known as widow-makers. Another hazard would be large dead sections. Large dead sections can come loose during the felling operation and when they fall they usually fall right where the person is making that cut. Lastly in our scenario we have what i call the hidden hazards and that’s vines they’re very hard to see and what makes them such a hazard as they can do a few things to you if you don’t pick them up. One is they can keep the tree from falling on course and hold and suspend the tree in midair which creates another hazard. They could swing the tree off course if it breaks free from the hinge or it could break something out behind you as you’re making the cut which is just a bad scenario.
All right, once we identify all the hazards there next on our list is to assess the tree. First and foremost is will the tree fit. If the tree will fit next thing I’m looking for is assessing the tree for a few things. One is I want to know if there’s any kind of lean. We usually look to see if the tree is forward lean, back lean or side lean. That will tell me what I need to compensate for to get the tree where we intend it to go. Now when I’m talking about assessing the tree I’m not just looking at the trunk. That’s part of it, the other part is looking at the branch structure because if you have so many branches leaning out one way or the other it’s going to help determine which way the tree wants to go when it’s released.
The next step is working on our work zone to make sure it’s free of debris and clear of any kind of tripping hazards. I just finished cutting down all the underbrush now we’re going to go in and start moving it out of our way. Now the work zone is almost clear the last thing we must deal with is if the tree is uprooted is putting pressure on the trunk. We need to get rid of that and get all the debris out the way. We’re going to take care of it all right now we got our work zone clear and the debris removed off the trunk so we should be just about ready to go.
When I’m trying to do with my face cuts is making knots in the front of the tree basically about 70 degrees or wider to allow the tree to come all the way over before it breaks the hinge and I’m going to a depth of approximately a third way in or less which is about eighty percent of the overall width. That’s what I really need to try to do to make the perfect cut.
All right let’s make our first cut. One thing I like to do is halfway through my top cut is stop and shut this off and then look at your site and make sure you’re on the path you intend to be. If not, you make time to make an adjustment before anything happens. Once we make the face cut the next step is going to be setting up our hinge. We’re going to do something called a board cut here because we want to use wedges because the tree has very little lean. We want to make sure it goes where we intend it to go and doesn’t sit back on us. I’m going to come just behind the face cut about an inch back into the tree and cut all the interior out leaving the back called a strap on there and we’re going to hammer wedges in.
That’s all there is to this type of tree removal job. Just be safe and methodical and keep your eyes open at all times.